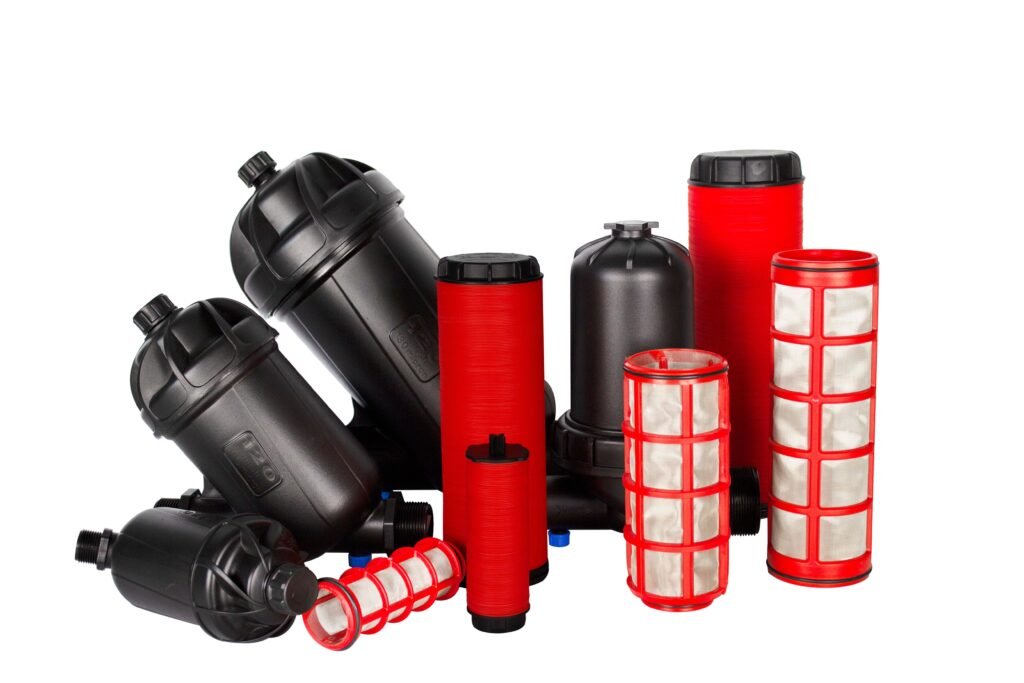
Welcome to our comprehensive DIY installation guide for irrigation filters. Whether you’re a seasoned gardener or just starting out, ensuring the quality of your irrigation system is crucial for maintaining a healthy and thriving garden. In this guide, we will walk you through the step-by-step process of installing irrigation filters, providing you with the knowledge and confidence to tackle this project on your own. By following our detailed instructions, you’ll be able to optimize the efficiency of your irrigation system, protect your plants from potential harm, and save both time and money. Let’s get started!
Understanding the Importance of Irrigation Filters
Before delving into the installation process, it’s important to understand why irrigation filters are a critical component of any irrigation system. These filters are designed to remove impurities, such as sediment, debris, and organic matter, from the water supply. By doing so, they prevent clogging and damage to sprinklers, nozzles, and other irrigation components, ensuring uninterrupted water flow and optimal performance.

Gathering the Necessary Tools and Materials
To begin the installation process, gather the following tools and materials:
- Irrigation Filter: Choose a filter that suits your specific needs, such as a screen or disc filter. Consider factors like flow rate, mesh size, and filter type.
- PVC pipes and fittings: Measure and cut the required length of PVC pipes, elbows, tees, and couplings based on your irrigation system layout.
- PVC cement and primer: These will be used to secure the PVC connections and ensure a watertight seal.
- Teflon tape: Apply this tape to the threaded connections for added leak protection.
- Pipe cutter or hacksaw: Use a pipe cutter or hacksaw to cut the PVC pipes to the desired lengths accurately.
- Adjustable wrench or pliers: These tools will come in handy when tightening fittings.
Determining the Installation Location
Next, identify the ideal location to install your irrigation filter. It should be easily accessible for maintenance and should not impede water flow. Look for a spot near the main water supply line or pump, typically before the control valves. Make sure the area is clear of any obstructions and provides enough space to accommodate the filter and associated piping.
Installing the Irrigation Filter
Follow these steps for a successful irrigation filter installation:
Step 1: Shut off the water supply: Locate the main water shut-off valve and turn it off to prevent water flow during the installation process.
Step 2: Cut the pipe: Use a pipe cutter or hacksaw to cut the PVC pipe where you intend to install the filter. Ensure the cut is clean and square for proper fittings.
Step 3: Attach fittings: Apply PVC primer to the outside of the pipe and the inside of the fittings. Then, apply PVC cement to both the pipe and fittings. Insert the fittings into the pipe ends and twist them slightly to ensure a secure bond. Hold them in place for a few seconds to allow the cement to set.
Step 4: Install the filter: Connect the filter to the fittings. Ensure that the flow direction arrow on the filter aligns with the water flow direction. Use Teflon tape to create a watertight seal on the threaded connections.
Step 5: Connect the outlet pipe: Attach another section of the PVC pipe to the outlet side of the filter using the same method described in Step 3. This pipe will direct the filtered water to the rest of your irrigation system.
Step 6: Turn on the water supply: Slowly open the main water shut-off valve to allow water to flow through the newly installed filter. Check for any leaks and tighten connections if necessary.
Regular Maintenance and Troubleshooting Tips
To ensure the longevity and optimal performance of your irrigation filter, follow these maintenance and troubleshooting tips:
- Regularly inspect and clean the filter element according to the manufacturer’s instructions.
- Check for any leaks or loose connections during routine inspections. Tighten fittings if needed.
- If the filter becomes excessively clogged, consider using a backflushing technique or consult the manufacturer for guidance.
- In freezing temperatures, drain the filter and protect it from potential damage.
- Keep spare filter elements on hand to quickly replace a worn-out or damaged one.
Conclusion
Congratulations! You have successfully installed an irrigation filter for your garden’s irrigation system. By taking the time to understand the importance of irrigation filters, gather the necessary tools and materials, determine the installation location, and follow our step-by-step instructions, you’ve ensured the efficient and reliable operation of your irrigation system.
Remember, regular maintenance and troubleshooting are essential to keep your irrigation filter in top shape. By incorporating these practices into your routine, you’ll enjoy a healthier garden, reduced maintenance costs, and improved water efficiency.

